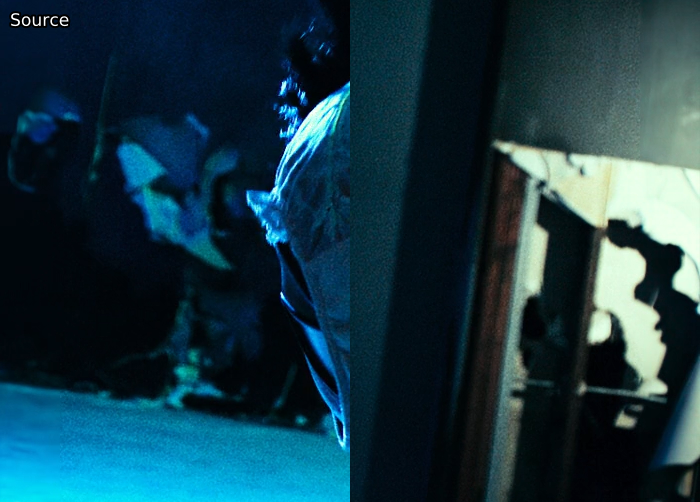
颗粒化
TODO: 解释为什么我们这么喜欢颗粒,以及静态与动态颗粒。 还有,图像。
颗粒过滤器
你可以用几个不同的过滤器来颗粒化。 由于很多函数的工作原理类似,我们将只介绍AddGrain和libplacebo颗粒。
AddGrain
这个插件允许你以不同的强度和颗粒模式在luma和chroma颗粒中添加颗粒。
grain = src.grain.Add(var=1.0, uvar=0.0, seed=-1, constant=False)
这里,var设置luma面的颗粒强度,uvar设置chroma面的强度。
seed允许你指定一个自定义的颗粒模式,如果你想多次复制一个颗粒模式,例如用于比较编码,这很有用。
constant允许你在静态和动态纹理之间进行选择。
提高强度既可以增加颗粒的数量,也可以增加颗粒像素与原始像素的偏移。 例如,`var=1'会导致数值与输入值相差3个8位数。
直接使用这个函数没有实际意义,但知道它的作用是很好的,因为它被认为是常用的颗粒器。
深入解释
这个插件使用正态分布来寻找它改变输入的值。 参数 `var` 是正态分布的标准差 (通常记做 \(\sigma\)) 。这意味着 (这些都是近似值):
- \(68.27\%\) 的输出像素值在输入值的 \(\pm1\times\mathtt{var}\) 倍以内
- \(95.45\%\) 的输出像素值在输入值的 \(\pm2\times\mathtt{var}\) 倍以内
- \(99.73\%\) 的输出像素值在输入值的 \(\pm3\times\mathtt{var}\) 倍以内
- \(50\%\) 的输出像素值在输入值的 \(\pm0.675\times\mathtt{var}\) 倍以内
- \(90\%\) 的输出像素值在输入值的 \(\pm1.645\times\mathtt{var}\) 倍以内
- \(95\%\) 的输出像素值在输入值的 \(\pm1.960\times\mathtt{var}\) 倍以内
- \(99\%\) 的输出像素值在输入值的 \(\pm2.576\times\mathtt{var}\) 倍以内
placebo.Deband as a grainer
另外,只用placebo.Deband作为一个颗粒器,也能带来一些不错的结果。
grain = placebo.Deband(iterations=0, grain=6.0)
这里的主要优势是它在你的GPU上运行,所以如果你的GPU还没有忙于其他的过滤器,使用这个可以让你的速度略有提高。
深入解释
TODOadaptive_grain
这个函数来自kagefunc,根据整体帧亮度和单个像素亮度应用AddGrain。
这对于掩盖小的条带和/或帮助x264将更多的比特分配给暗部非常有用。
grain = kgf.adaptive_grain(src, strength=.25, static=True, luma_scaling=12, show_mask=False)
这里的强度是AddGrain的var。
默认值或稍低的值通常是好的。
你可能不希望超过0.75。
luma_scaling参数用于控制它对暗色帧的偏爱程度,即较低的luma_scaling将对亮色帧应用更多的纹理。
你可以在这里使用极低或极高的值,这取决于你想要什么。
例如,如果你想对所有的帧进行明显的纹理处理,你可以使用luma_scaling=5,而如果你只想对较暗的帧的暗部进行纹理处理以掩盖轻微的带状物,你可以使用luma_scaling=100。
show_mask显示用于应用纹理的遮罩,越白意味着应用的纹理越多。
建议在调整luma_scaling时打开它。
深入解释
该方法的作者写了一篇精彩的博文,解释了该函数和它的工作原理。GrainFactory3
TODO:重写或直接删除它。
作为kgf.adaptive_grain的一个较早的替代品,havsfunc的GrainFactory3仍然相当有趣。
它根据像素值的亮度将其分成四组,并通过AddGrain将不同大小的颗粒以不同的强度应用于这些组。
grain = haf.GrainFactory3(src, g1str=7.0, g2str=5.0, g3str=3.0, g1shrp=60, g2shrp=66, g3shrp=80, g1size=1.5, g2size=1.2, g3size=0.9, temp_avg=0, ontop_grain=0.0, th1=24, th2=56, th3=128, th4=160)
参数的解释在源代码上面。
这个函数主要是在你想只对特定的帧应用颗粒时有用,因为如果对整个视频应用颗粒,应该考虑整体的帧亮度。
例如,GrainFactory3 可以弥补左右边框的颗粒缺失:

深入解释
TODO简而言之:为每个亮度组创建一个蒙版,使用双曲线调整大小,用锐度控制b和c来调整纹理的大小,然后应用这个。 时间平均法只是使用misc.AverageFrames对当前帧和其直接邻接的纹理进行平均。
adptvgrnMod
这个函数以GrainFactory3的方式调整颗粒大小,然后使用adaptive_grain的方法进行应用。
它还对暗部和亮部进行了一些保护,以保持平均帧亮度。
grain = agm.adptvgrnMod(strength=0.25, cstrength=None, size=1, sharp=50, static=False, luma_scaling=12, seed=-1, show_mask=False)
颗粒强度由luam的strength和chroma的cstrength控制。
cstrength默认为strength的一半。
就像adaptive_grain一样,默认值或稍低的值通常是好的,但你不应该太高。
如果你使用的size大于默认值,你可以用更高的值,例如strength=1,但还是建议对颗粒应用保持保守。
size and sharp 参数允许你使应用的颗粒看起来更像电影的其他部分。
建议对这些参数进行调整,以便使假的颗粒不会太明显。
在大多数情况下,你会想稍微提高这两个参数,例如:size=1.2, sharp=60。
static、luma_scaling和show_mask等同于adaptive_grain,所以看上面的解释。
seed与AddGrain的相同;同样,向上面解释。
默认情况下,adptvgrnMod会淡化极值(16或235)附近的纹理和灰色的阴影。
这些功能可以通过设置fade_edges=False和protect_neutral=False分别关闭。
最近,用这个功能从一个人的磨光机中完全去除颗粒,并将磨光的区域完全磨光,这已成为普遍的做法。
sizedgrn
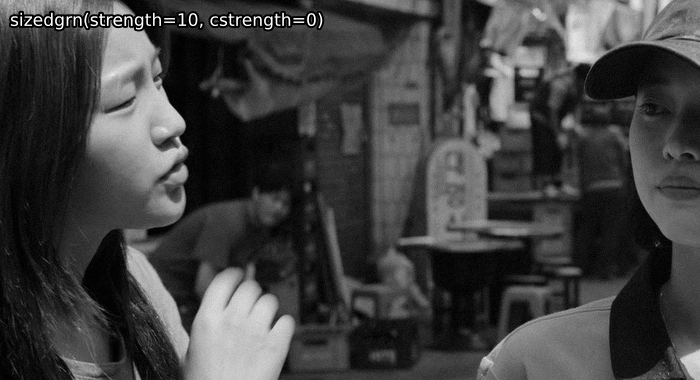
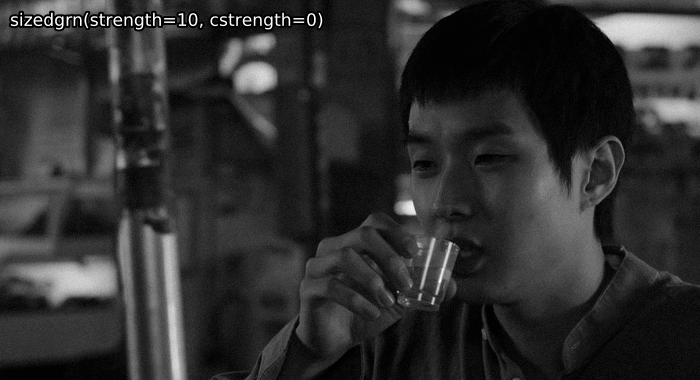
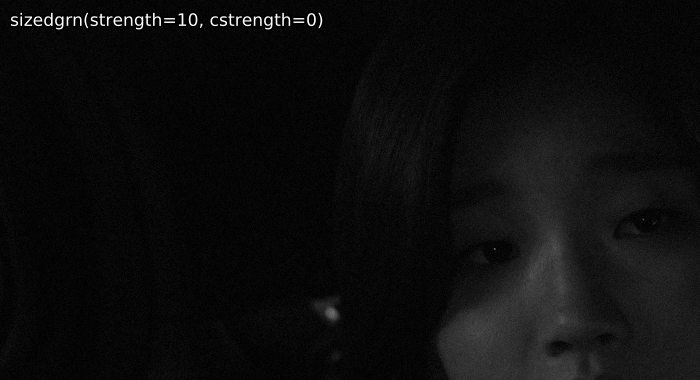
如果想禁用基于亮度的应用,可以使用sizedgrn,它是adptvgrnMod中的内部粒度函数。
一些 adptvgrnMod 与 sizedgrn 对比的例子,供好奇的人参考
一个明亮的场景,基于亮度的应用产生了很大的差异:

一个整体较暗的场景,其中的差异要小得多:

一个黑暗的场景,在画面中的每一个地方都均匀地(几乎)应用了颗粒:

深入解释
(该功能的作者的旧文。)Size and Sharpness
adptvgrnMod的颗粒化部分与GrainFactory3的相同;它在尺寸参数定义的分辨率下创建一个 "空白"(比特深度的中间点)剪辑,然后通过一个使用由sharp决定的b和c值的二次方内核进行扩展:
$$\mathrm{grain\ width} = \mathrm{mod}4 \left( \frac{\mathrm{clip\ width}}{\mathrm{size}} \right)$$
例如,一个1920x1080的片段,尺寸值为1.5:
$$ \mathrm{mod}4 \left( \frac{1920}{1.5} \right) = 1280 $$
这决定了颗粒器所操作的帧的大小。
现在,决定使用bicubic kernel的参数:
$$ b = \frac{\mathrm{sharp}}{-50} + 1 $$ $$ c = \frac{1 - b}{2} $$
这意味着,对于默认的50的锐度,使用的是Catmull-Rom过滤器:
$$ b = 0, \qquad c = 0.5 $$
Values under 50 will tend towards B-Spline (b=1, c=0), while ones above 50 will tend towards b=-1, c=1. As such, for a Mitchell (b=1/3, c=1/3) filter, one would require sharp of 100/3.
The grained "blank" clip is then resized to the input clip's resolution with this kernel. If size is greater than 1.5, an additional resizer call is added before the upscale to the input resolution:
$$ \mathrm{pre\ width} = \mathrm{mod}4 \left( \frac{\mathrm{clip\ width} + \mathrm{grain\ width}}{2} \right) $$
With our resolutions so far (assuming we did this for size 1.5), this would be 1600. This means with size 2, where this preprocessing would actually occur, our grain would go through the following resolutions:
$$ 960 \rightarrow 1440 \rightarrow 1920 $$
Fade Edges
The fade_edges parameter introduces the option to attempt to maintain overall average image brightness, similar to ideal dithering. It does so by limiting the graining at the edges of the clip's range. This is done via the following expression:
x y neutral - abs - low < x y neutral - abs + high > or
x y neutral - x + ?
Here, x is the input clip, y is the grained clip, neutral is the midway point from the previously grained clip, and low and high are the edges of the range (e.g. 16 and 235 for 8-bit luma). Converted from postfix to infix notation, this reads:
\[x = x\ \mathtt{if}\ x - \mathrm{abs}(y - neutral) < low\ \mathtt{or}\ x - \mathrm{abs}(y - neutral) > high\ \mathtt{else}\ x + (y - neutral)\]
The effect here is that all grain that wouldn't be clipped during output regardless of whether it grains in a positive or negative direction remains, while grain that would pass the plane's limits isn't taken.
In addition to this parameter, protect_neutral is also available. This parameter protects "neutral" chroma (i.e. chroma for shades of gray) from being grained. To do this, it takes advantage of AddGrainC working according to a Guassian distribution, which means that $$max\ value = 3 \times \sigma$$ (sigma being the standard deviation - the strength or cstrength parameter) is with 99.73% certainty the largest deviated value from the norm (0). This means we can perform a similar operation to the one for fade_edges to keep the midways from being grained. To do this, we resize the input clip to 4:4:4 and use the following expression:
\[\begin{align}x \leq (low + max\ value)\ \mathtt{or}\ x \geq (high - max\ value)\ \mathtt{and}\\ \mathrm{abs}(y - neutral) \leq max\ value\ \mathtt{and}\ \mathrm{abs}(z - neutral) \leq max\ value \end{align}\]
With x, y, z being each of the three planes. If the statement is true, the input clip is returned, else the grained clip is returned.
I originally thought the logic behind protect_neutral would also work well for fade_edges, but I then realized this would completely remove grain near the edges instead of fading it.
Now, the input clip and grained clip (which was merged via std.MergeDiff, which is x - y - neutral) can be merged via the adaptive_grain mask.